Changing the user interface of certain bits of SharePoint has always been somewhat challenging – at least, if we want to avoid the SharePoint Designer route and produce something which is packaged, deployable as a WSP and repeatable across many sites. Not to mention source-controlled. A common area of customization is the user interface around SharePoint lists - when it comes to this, there are a few “flavours” of common requests:
- Custom list forms – e.g. a more “designed” form for adding and/or editing items
- Custom behaviour for a certain field - e.g. a “UK address” field which allows postcode lookup
- Custom rendering of a list in display mode (e.g. the ‘All items’ view) – a good example of this is conditional formatting e.g. “Add a red background to the row if the value for ‘Days overdue’ is over 5”
As you might guess from the article title, it’s the third scenario that this article focuses on, for SharePoint 2013 specifically.
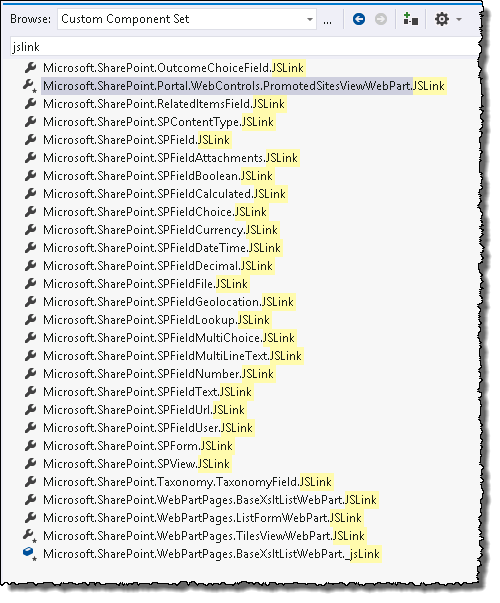
Earlier versions of SharePoint gave us a couple of approaches for fulfilling some of these requirements. We could create a custom field control (item number 2 above) or modify the XSLT of an XsltListView perhaps (number 3 above) – a method that was new in SP2010 of course, since we previously had CAML rendering for list views (yuck). SharePoint 2013 brings a new JavaScript-based approach for modifying the UI of fields and lists, and many more things too. You’ll often see this referred to as “JSLink”, because many things in SP2013 have a new JSLink property which you use to point to your JavaScript file. Here’s a list of SharePoint objects which you can modify in this way:
Lots of interesting possibilities there – all the field types are obviously represented, but binding UI changes to a:
- content type
- form
- view
- list view web part instance (rather than to the list/view itself)
..could all be extremely useful.
[As an aside, if you came to this article looking for a solution to the 1st scenario above (modifying forms), you’ll probably be interested that SPForm has a JSLink property. However I imagine there’s still a place for providing entirely custom forms as opposed to making relatively small changes with JavaScript. The old approaches still apply here - modifying list forms is easy in SPD, but requires a bit more thought in the Visual Studio world. In that case, we’d probably want to NOT edit the original .aspx, but instead provide a different .aspx file and update the SPList.NewFormUrl and/or SPList.EditFormUrl properties to point to it (e.g. in a Feature receiver).]
Implementing changes to list rendering with JSLink
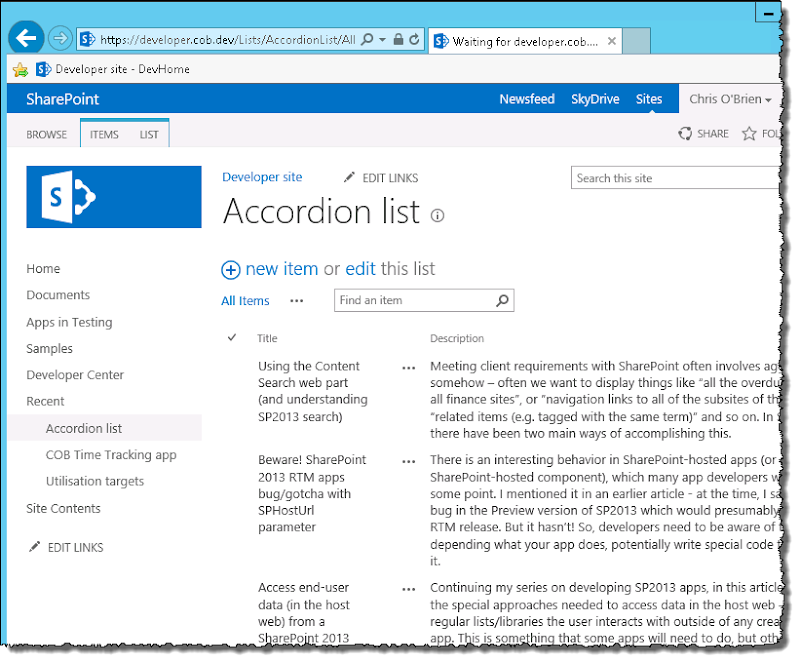
For a recent SharePoint talk, I wanted a fairly dramatic example of changing the UI of a list (when looking at list items). So, my example showed changing the list from this:
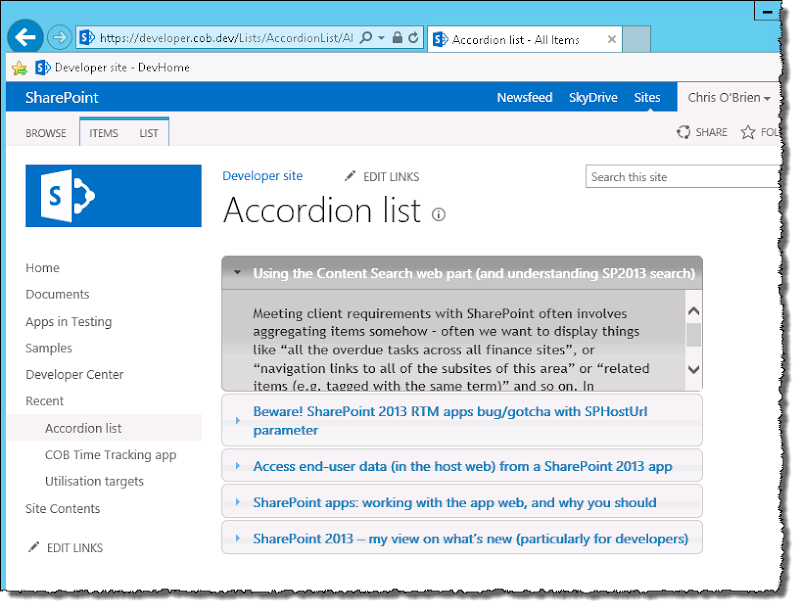
..to this:
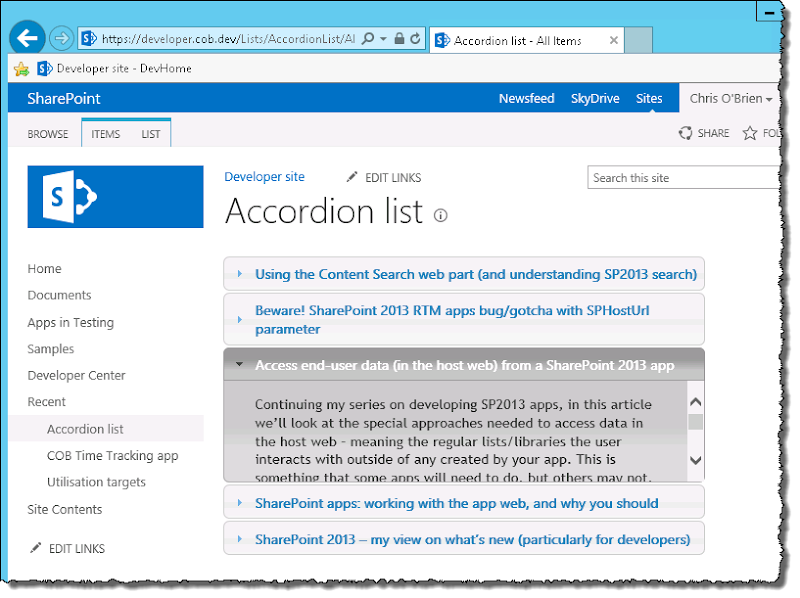
There are some slightly nasty scrollbars in these images, but that’s just because I’ve reduced the size of the window for my screenshots - normally the accordion looks great. As you might imagine, I get a nice sliding “expand and contract” experience when I select different items:
If you’ve worked with it before, you’ll immediately recognise this as the accordion from jQuery UI. In many ways, it’s a nice example, since although YOU are unlikely to need/want to use jQuery accordion for your “customizing a list” needs, it uses custom CSS, images and JavaScript to provide rendering which you probably ARE going to need. So, I’ll walk through most aspects of this process, but as you’ll see only around 20% of the work relates to the JSLink stuff – the rest is just scaffolding. We’ll cover the JSLink specifics first.
The full Visual Studio project can be downloaded at the end of this article.
The important bit (part 1)– how to hook up your custom rendering with JSLink (e.g. call into jQuery UI accordion)
The first thing to say is that when we want to change the rendering of a SharePoint list, it’s actually individual views (SPView) we’ll be working with. The SPList class does NOT have a JSLink property, which makes sense given this is all about presentation. Getting SharePoint to “see” your custom rendering will probably depend on what you’re doing:
Scenario
|
Approach
|
| Creating a new list | Specify the path to your .js file in the schema.xml file for the list (specifically within the declaration for the view) |
| Modifying an existing list | In code, update the SPLink property (i.e. SPView.JSLink) to provide the path to your .js file (using PowerShell/server-side/client-side API as appropriate) |
This bit only ensures your .js file is referenced by the page. You also need to make sure it has the right contents to register your display templates – we’ll come to that in a second.
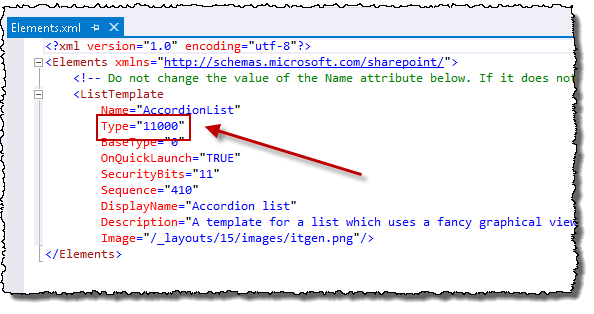
In my case, I’m creating a new list – it’s worth noting that I’m assigning a list type ID of “11000” – we’ll use this later with respect to JSLink:
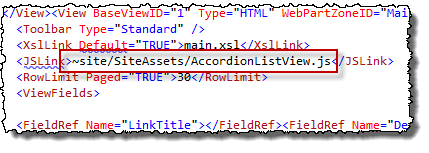
When developing for SharePoint 2013 onwards, when a list is created in Visual Studio the JSLink element for any views will contain “clienttemplates.js”:
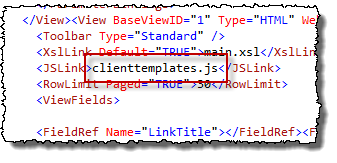
..but we should change that to our custom JavaScript file which has our display template implementation (you’ll see me deploy this later):
Our file will then be loaded when this view is requested (i.e. SharePoint will add the .js file to the page). But that’s not enough – we now have to think about what JavaScript is needed to actually register the templates. This is done by specifying two properties of the list views to match:
- OPTIONAL - the BaseViewID property (e.g. BaseViewID=1 for a standard view like “All items”, but you could use another ID for a custom view)
- The ListTemplateType property (for a new list, you’ll be specifying a unique integer value e.g. 10000)
So, it’s usually a combination of THREE controls overall which dictate how rendering is applied to a list view – the JSLink path, BaseViewID andListTemplateType. Although BaseViewID appears to be optional, it seems sensible to set it to avoid unforeseen problems with Explorer View/Datasheet View etc. So for a given list, if you wanted one view to have custom rendering and one to have default rendering (even though they share aBaseViewID), simply ensure the JSLink property for the default one is NOT set to your custom .js file.
I also note that it appears possible to specify multiple values in a JSLink path – I haven’t tried this, but I see things like<JSLink>mquery.js|contentfollowing.js</JSLink> (note the pipe character) within out-of-the-box files under the 15 folder.
The important bit (part 2)– what your JavaScript should look like:
Here’s my full AccordionListView.js file specified in the JSLink property for my view – I supply a header and footer and then a JavaScript method (function pointer) to execute for each list item. Notice some context gets passed to this function, including details of the list item:
| // function to process an accordion item.. |
| window.COB = window.COB || {}; |
| window.COB.accordionItem = { |
| customItemHtml: function (ctx) { |
| var accordionItemHtml = "<h3>" + ctx.CurrentItem.Title + "</h3>"; |
| accordionItemHtml += "<div>" + ctx.CurrentItem.AccordionItemDescription + "</div>"; |
| return accordionItemHtml; |
| } |
| }; |
|
|
| // anonymous self-executing function to setup JSLink templates on page load.. |
| (function () { |
| var overrideCtx = {}; |
| overrideCtx.Templates = {}; |
|
|
| overrideCtx.Templates.Header = "<div id=\"accordion\">"; |
| overrideCtx.Templates.Item = window.COB.accordionItem.customItemHtml; |
| overrideCtx.Templates.Footer = "</div>"; |
|
|
| overrideCtx.BaseViewID = 1; |
| overrideCtx.ListTemplateType = 11000; |
|
|
| SPClientTemplates.TemplateManager.RegisterTemplateOverrides(overrideCtx); |
| })(); |
|
|
| $(document).ready(function () { |
| // It seems SharePoint inserts a script tag in an inconvenient place that breaks jQuery UI's accordion, so let's remove it! |
| // (N.B. further testing recommended for production).. |
| $("#accordion").find('#scriptBodyWPQ2').remove(); |
|
|
| $("#accordion").width('70%'); |
| $("#accordion").accordion(); |
| }); |
As you might be able to infer, the jQuery UI accordion expects a H3 and div element for each item – so that’s what my template does, in addition to actually calling the accordion() method.
An issue with JSLink and the Minimal Download Strategy (MDS)?
Continuing my recent tradition of discovering slightly strange behaviour around what I’m writing about, this week is no exception. In my testing, I noticed that if a list has multiple views and the user switches between them, the client templates specified by JSLink do not get applied if MDS is enabled (even though the debugger shows they are called). I’m hoping that I’m doing something wrong, but I can’t rule out a bug in SharePoint 2013’s MDS framework at this stage.
If anyone sees this/has any info, please leave a comment :)
Integrating CSS/JS (such as jQuery UI) into the solution
OK, so if all you wanted to know about was the JSLink aspect, we’re now done covering that. Hopefully that was useful. The remaining bits of this article will cover the “scaffolding” aspects of my particular jQuery UI accordion example – integrating jQuery/jQuery UI, and so on.
My first step was to go to the
jQuery UI Download Builder and download the files (plus jQuery too if you don’t have it already). If you haven’t done this before, you can basically configure some options (e.g. styles, behaviors, jQuery UI widgets to use) to build a package for download – this means you get a smaller package than if you were opted for
all styles and
all jQuery UI components. You’ll therefore have lower page weight and better performance, than if you were using the full set. However, I had an issue where my solution would only work with the full jQuery UI file rather than the one I “built” – if this was production code I’d stop and resolve this, but for demoware I was OK with it.
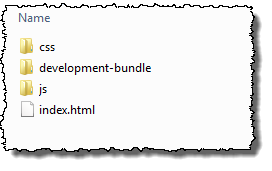
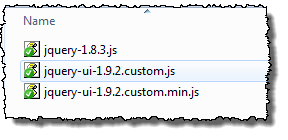
When you get your download and crack it open, you’ll have some CSS and JavaScript files:
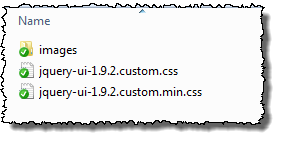
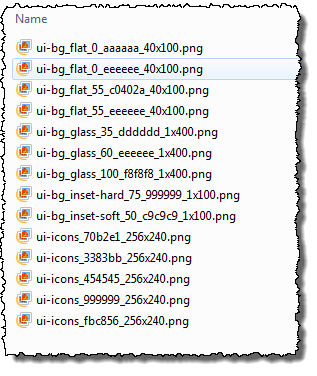
I chose a grey-ish theme called “overcast”, and within the CSS folder come a stack of images – we’ll need to integrate all of these files into our VS project:
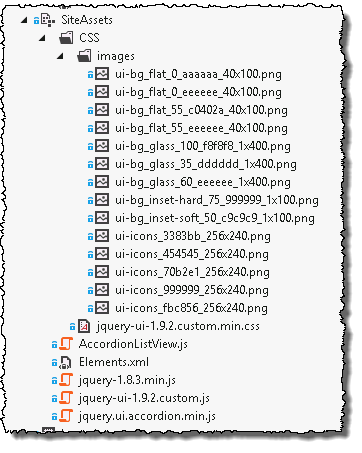
In my project, I created a “Site Assets” folder to house my supporting images, CSS and JavaScript – since I’m working in a sandboxed solution, I need these to go into the content database and in my case the contents get deployed to the SharePoint library of the same name. After copy/pasting these files into my Visual Studio project, I get this:
..and, 0f course, Visual Studio is kind enough to detect the new files and generates my elements.xml file accordingly:
| <?xml version="1.0" encoding="utf-8"?> |
| <Elements xmlns="http://schemas.microsoft.com/sharepoint/"> |
| <Module Name="SiteAssets" Url="SiteAssets"> |
| <File Path="SiteAssets\AccordionListView.js" Url="AccordionListView.js" /> |
| <File Path="SiteAssets\jquery-1.8.3.min.js" Url="jquery-1.8.3.min.js" /> |
| <File Path="SiteAssets\jquery.ui.accordion.min.js" Url="jquery.ui.accordion.min.js" /> |
| <File Path="SiteAssets\CSS\jquery-ui-1.9.2.custom.min.css" Url="CSS/jquery-ui-1.9.2.custom.min.css" /> |
| <File Path="SiteAssets\CSS\images\ui-bg_flat_0_aaaaaa_40x100.png" Url="CSS/images/ui-bg_flat_0_aaaaaa_40x100.png" /> |
| <File Path="SiteAssets\CSS\images\ui-bg_flat_0_eeeeee_40x100.png" Url="CSS/images/ui-bg_flat_0_eeeeee_40x100.png" /> |
| <File Path="SiteAssets\CSS\images\ui-bg_flat_55_c0402a_40x100.png" Url="CSS/images/ui-bg_flat_55_c0402a_40x100.png" /> |
| <File Path="SiteAssets\CSS\images\ui-bg_flat_55_eeeeee_40x100.png" Url="CSS/images/ui-bg_flat_55_eeeeee_40x100.png" /> |
| <File Path="SiteAssets\CSS\images\ui-bg_glass_100_f8f8f8_1x400.png" Url="CSS/images/ui-bg_glass_100_f8f8f8_1x400.png" /> |
| <File Path="SiteAssets\CSS\images\ui-bg_glass_35_dddddd_1x400.png" Url="CSS/images/ui-bg_glass_35_dddddd_1x400.png" /> |
| <File Path="SiteAssets\CSS\images\ui-bg_glass_60_eeeeee_1x400.png" Url="CSS/images/ui-bg_glass_60_eeeeee_1x400.png" /> |
| <File Path="SiteAssets\CSS\images\ui-bg_inset-hard_75_999999_1x100.png" Url="CSS/images/ui-bg_inset-hard_75_999999_1x100.png" /> |
| <File Path="SiteAssets\CSS\images\ui-bg_inset-soft_50_c9c9c9_1x100.png" Url="CSS/images/ui-bg_inset-soft_50_c9c9c9_1x100.png" /> |
| <File Path="SiteAssets\CSS\images\ui-icons_3383bb_256x240.png" Url="CSS/images/ui-icons_3383bb_256x240.png" /> |
| <File Path="SiteAssets\CSS\images\ui-icons_454545_256x240.png" Url="CSS/images/ui-icons_454545_256x240.png" /> |
| <File Path="SiteAssets\CSS\images\ui-icons_70b2e1_256x240.png" Url="CSS/images/ui-icons_70b2e1_256x240.png" /> |
| <File Path="SiteAssets\CSS\images\ui-icons_999999_256x240.png" Url="CSS/images/ui-icons_999999_256x240.png" /> |
| <File Path="SiteAssets\CSS\images\ui-icons_fbc856_256x240.png" Url="CSS/images/ui-icons_fbc856_256x240.png" /> |
| <File Path="SiteAssets\jquery-ui-1.9.2.custom.js" Url="jquery-ui-1.9.2.custom.js" /> |
| </Module> |
| </Elements> |
The next step is to ensure the site we’re deploying to references these files – we’ll deal with JavaScript first and then CSS.
Add jQuery/jQuery UI to the page (in this case, every page in the web)
Here we need to ensure jQuery and jQuery UI are added to pages in the site. Since we’re not deploying a custom master page (and don’t want to use the Content Editor web part to add JS to the page), we’ll need to use either CustomAction + ScriptLink or a delegate control going into ‘AdditionalPageHead’. In my case I’m choosing the former so that my solution works in the cloud (as a sandboxed solution):
| <?xml version="1.0" encoding="utf-8"?> |
| <Elements xmlns="http://schemas.microsoft.com/sharepoint/"> |
| <CustomAction |
| ScriptSrc="~SiteCollection/SiteAssets/jquery-1.8.3.min.js" |
| Location="ScriptLink" |
| Sequence="10"> |
| </CustomAction> |
| <CustomAction |
| ScriptSrc="~SiteCollection/SiteAssets/jquery-ui-1.9.2.custom.js" |
| Location="ScriptLink" |
| Sequence="20"> |
| </CustomAction> |
| </Elements> |
Notice that I’m referencing a non-minified version of jQuery UI – that was the issue I said earlier that I would resolve for production use. The next step is CSS.
Ensure the jQuery UI branding/CSS is applied
Since we’re not using a custom master page, we’re just using the AlternateCssUrl property of the web to ensure our custom CSS file is referenced by our pages:
| using System; |
| using System.Runtime.InteropServices; |
| using System.Security.Permissions; |
| using Microsoft.SharePoint; |
|
|
| namespace COB.SharePoint.AccordionList.Features.AccordionList |
| { |
| /// <summary> |
| /// Adds a custom CSS file reference so that jQuery UI branding is applied. Also deletes the accordion list on deactivation. |
| /// </summary> |
| /// <remarks> |
| /// The GUID attached to this class may be used during packaging and should not be modified. |
| /// </remarks> |
| [Guid("e81dd029-cc9e-438a-bfeb-08539ad847c3")] |
| public class AccordionListEventReceiver : SPFeatureReceiver |
| { |
| public override void FeatureActivated(SPFeatureReceiverProperties properties) |
| { |
| SPWeb parentWeb = (SPWeb)properties.Feature.Parent; |
| parentWeb.AlternateCssUrl = "/SiteAssets/CSS/jquery-ui-1.9.2.custom.min.css"; |
| parentWeb.Update(); |
| } |
|
|
| public override void FeatureDeactivating(SPFeatureReceiverProperties properties) |
| { |
| // N.B. a further (optional) enhancement would be delete provisioned files here.. |
| SPWeb parentWeb = (SPWeb)properties.Feature.Parent; |
| SPList accordionList = parentWeb.Lists.TryGetList("Accordion list"); |
| if (accordionList != null) |
| { |
| parentWeb.Lists.Delete(accordionList.ID); |
| } |
| parentWeb.AlternateCssUrl = string.Empty; |
| parentWeb.Update(); |
| } |
| } |
| } |
Our site should now receive all branding and JavaScript dependencies – so if we were to deploy a static page with the correct HTML for a jQuery UI accordion, then it should work fine. However, we want ours to serve as the UI for a SharePoint list, so we’ll now create that list. In the final step we’ll do the actual JSLink work – this will change the rendering of the list at run-time.
Create the list we will use with JSLink
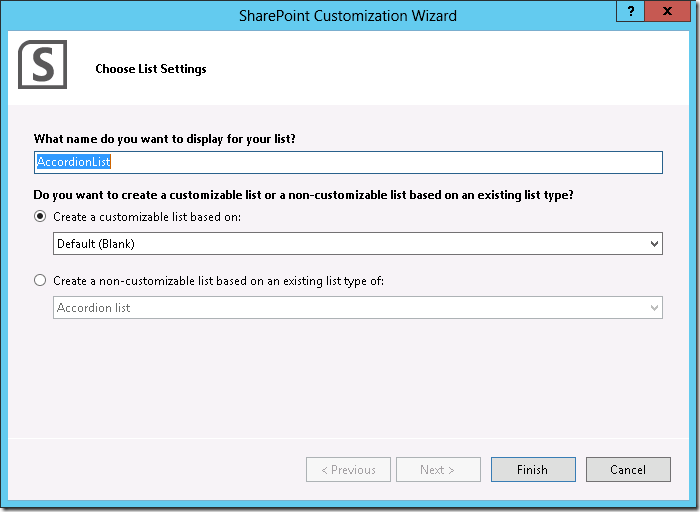
Nothing special here and I won’t go into every step – but it is worth mentioning that creating a list via Visual Studio 2012 is much easier than before:
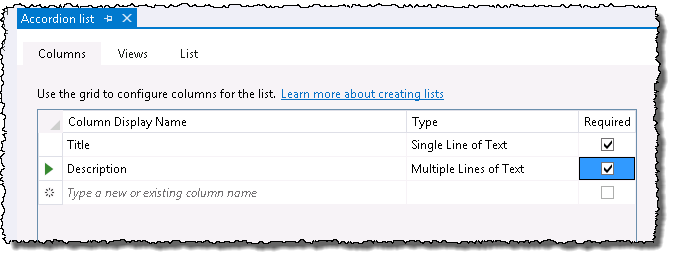
..then add whatever columns your list needs (here I’m adding them direct to the list rather than to a content type):
As we mentioned earlier, we are allocating a new list type ID (the value used was 11000) for the underlying template for this list – this is important since, in this “new list” scenario, we’re using a combination of this and the BaseViewID for the "All items” view to hang our JSLink customizations off:
Finally I add some dummy data (some old blog articles) to my list so each time I deploy/test, I don’t have to manually add list items:
| <?xml version="1.0" encoding="utf-8"?> |
| <Elements xmlns="http://schemas.microsoft.com/sharepoint/"> |
| <ListInstance Title="Accordion list" OnQuickLaunch="TRUE" TemplateType="11000" Url="Lists/AccordionList" Description="A list which shows it's items in a fancy graphical way"> |
| <Data> |
| <Rows> |
| <Row> |
| <Field Name="Title">Using the Content Search web part (and understanding SP2013 search)</Field> |
| <Field Name="AccordionItemDescription">Meeting client requirements with SharePoint often involves aggregating items somehow – often we want to display things like “all the overdue tasks across all finance sites”, or “navigation links to all of the subsites of this area” or “related items (e.g. tagged with the same term)” and so on. In SharePoint 2010 there have been two main ways of accomplishing this.</Field> |
| </Row> |
| <Row> |
| <Field Name="Title">Beware! SharePoint 2013 RTM apps bug/gotcha with SPHostUrl parameter</Field> |
| <Field Name="AccordionItemDescription">There is an interesting behavior in SharePoint-hosted apps (or apps with a SharePoint-hosted component), which many app developers will run into at some point. I mentioned it in an earlier article - at the time, I said that it was a bug in the Preview version of SP2013 which would presumably be fixed in the RTM release. But it hasn’t! So, developers need to be aware of this issue and depending what your app does, potentially write special code to work around it.</Field> |
| </Row> |
| <Row> |
| <Field Name="Title">Access end-user data (in the host web) from a SharePoint 2013 app</Field> |
| <Field Name="AccordionItemDescription">Continuing my series on developing SP2013 apps, in this article we’ll look at the special approaches needed to access data in the host web – meaning the regular lists/libraries the user interacts with outside of any created by your app. This is something that some apps will need to do, but others may not. For some, the whole premise around what the app does will be working with collaboration data in team sites/My Sites etc., so these techniques will be crucial there. Because there are so many flavors of SharePoint data access in apps, I’m going to spend some time explaining which this article applies to – feel free to scroll ahead to the code samples though!</Field> |
| </Row> |
| <Row> |
| <Field Name="Title">SharePoint apps: working with the app web, and why you should</Field> |
| <Field Name="AccordionItemDescription">You might already have come across the idea that SharePoint 2013 apps which host SharePoint components (e.g. lists, content types etc.) put these into an isolated area called the app web. If not, my previous article Creating lists, content types and fields within a SharePoint app (provisioning) provides some details, including some explanation around the diagram below, which summarises an app I’m building</Field> |
| </Row> |
| <Row> |
| <Field Name="Title">SharePoint 2013 – my view on what’s new (particularly for developers)</Field> |
| <Field Name="AccordionItemDescription">So the SharePoint 2013 (previously known as ‘SharePoint 15’, the internal name) public beta is finally here. And that means that MVPs, TAP participants and other folks with early access are no longer bound by their non-disclosure agreements and can now talk about the product publicly. No doubt there will be a flurry of blog posts, but I wanted to write up my thoughts on what has struck a chord with me in the next version – partly because I have friends and colleagues who might look to me for this information, but mainly because it helps me crystallize my thinking on some of the new aspects. This started as a “developer perspective” article, but hopefully also gives a sense of what the new version brings for everyone.</Field> |
| </Row> |
| </Rows> |
| </Data> |
| </ListInstance> |
| </Elements> |
