One of the new features of SharePoint 2013 is the SharePoint Store. Similar to the Windows Phone Marketplace and Google Play Store, this new feature gives site owners the ability to discover and download apps for SharePoint from the store and install them on their SharePoint Sites. Furthermore, if you are a developer for your company, you will need to setup your environment to host apps if you want to test them.
The following are examples of apps for SharePoint that site owners could add to their sites:
- An app that provides event planning tools.
- An app that provides a shopping cart experience for a site.
- An app that sends a note of recognition for good work (kudos) to someone in the organization.
When you install SharePoint 2013, by default this functionality is not supported and users will get the following error when they try to install an application.
Sorry, apps are turned off. If you know who runs the server, tell them to enable apps.
Sorry, apps are turned off. If you know who runs the server, tell them to enable apps.

This article will provide IT Professionals and Developers a step by step guide with screenshots on how to make your SharePoint 2013 environment capable of using SharePoint Store applications.
This is what you need before you start
- Have a Farm Administrator account with the DBCreator and SecurityAdmin roles on the SQL Server.
- Have a Domain Admin account.
Here is a an overview of what we will do
- Create a forward lookup zone for apps
- Link the App Domain to the SharePoint Server
- Start the required Services
- Create the Subscription Settings and App Management Service Applications
- Configure The App URL’s in SharePoint
- Fix the “Out of the Box” errors
- Test our environment
1. Create a forward lookup zone for apps
SharePoint 2013 Apps have their own, isolated URLs, which are separate from the URLs of the sites where the app is being deployed to and where the app is being used. In order to provide isolation apps should run in their own domain, instead of in the same domain name as your farm. Using a different domain name for apps helps prevent cross-site scripting between apps and SharePoint sites.
Microsoft recommends that the new domain name should NOT be a subdomain of the domain that hosts the SharePoint Sites. For example, if the SharePoint sites are at matrinescu.com, consider mcatrinescuApps.com instead of app.mcatrinescu.com as the domain name.
The DNS management tools are an optional component, and can be installed without installing the DNS Server components.
Server Manager | Features | Add Feature | Remote Server Administration Tools | Role Administration Tools
and select DNS Server.
- Verify that the user account that performs this procedure is a local administrator on the domain controller.
- Click Start, point to Administrative Tools, and then click DNS.
- In DNS Manager, right-click Forward Lookup Zones, and then click New Zone….
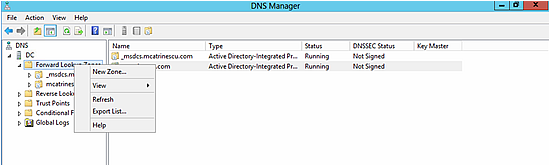
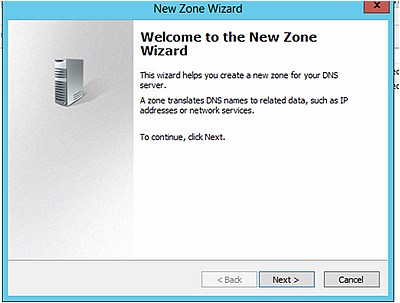
- In the New Zone Wizard, click Next.
- In the Zone Type page, accept the default of Primary zone, and then click Next.

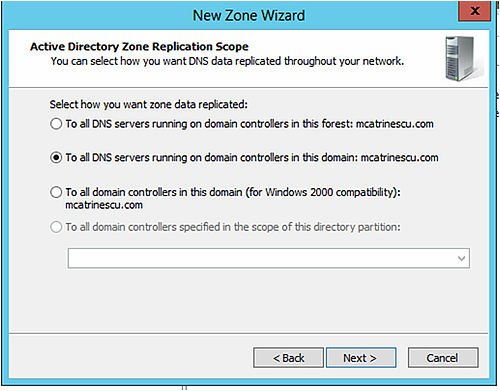
- In the Active Directory Zone Replication Scope page, select the appropriate replication method for your environment (the default is to all DNS servers in this domain), and then click Next.
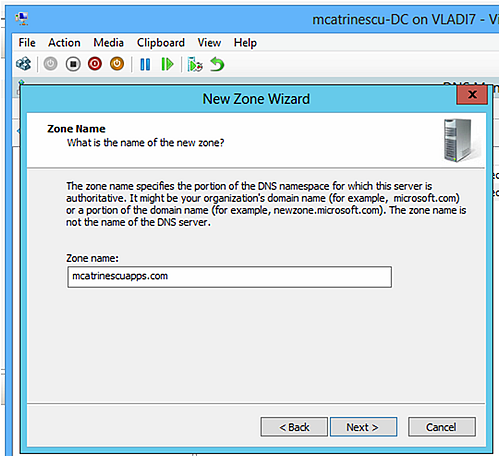
- In the Zone Name page, in the Zone name box type the name for your new app domain name (for example, mcatrinescuApps.com), and then click Next.
- On the Dynamic Update page, select the appropriate type of dynamic updates for your environment (the default is Do not allow dynamic updates), and then click Next.
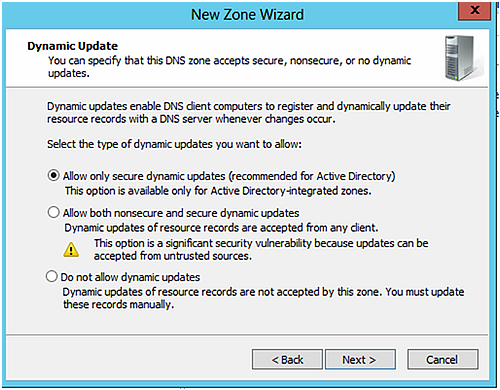
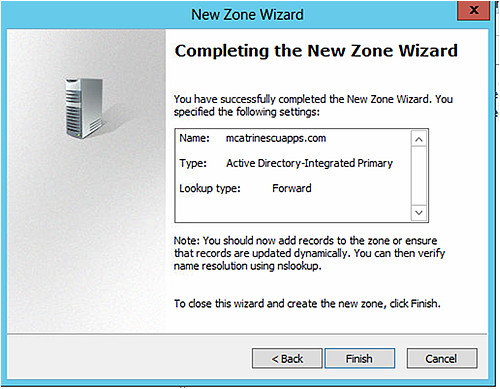
- On the Completing the New Zone Wizard page, review the settings, and then click Finish.
Don’t Forget: If you plan to use apps on an internet-facing website, you have to buy this domain name! Furthermore, even if you only use it internally, it’s always better to buy it before someone else buys it and registers it in the public DNS.
2. Link the App Domain to the SharePoint Server
We now need to instruct our DNS to forward all the requests from mcatrinescuapps.com to the SharePoint Server hosting the apps
- Verify you are logged in as a Domain Admin
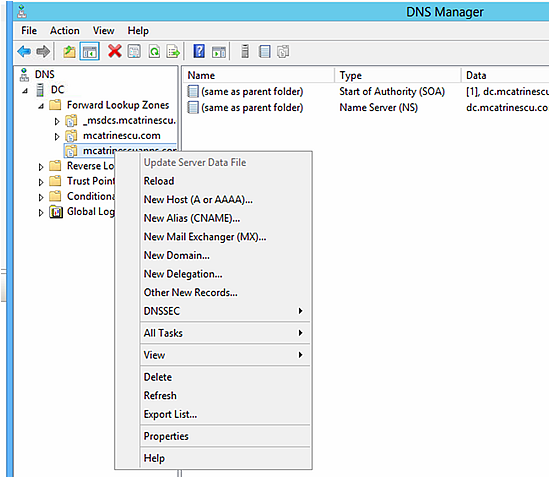
- In DNS Manager, under Forward Lookup Zones, right-click the new app domain name, and then click New Alias (CNAME).
- In the New Resource Record dialog box, in the Alias name (uses parent domain if left blank) box, type *.
- Next to the Fully qualified domain name (FQDN) for target host box, click Browse and navigate to the Forward Lookup Zone for the domain that hosts the SharePoint sites and then navigate to the record that points to the server that hosts the SharePoint site.
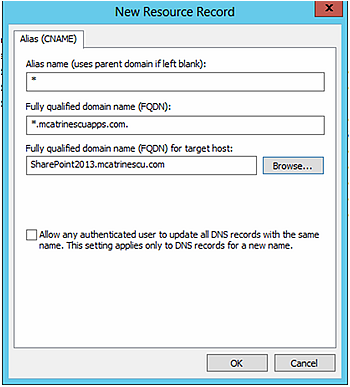
- Click OK.
To verify the new domain name
This is just a little step to make sure everything we did until now is right.
- Click Start, and then click Command Prompt.
- At the command prompt, type ping followed by a subdomain of the domain that you created, and then press ENTER. (EX: ping vlad.mcatrinescuapps.com) where vlad is a random word and mcatrinescuapps.com is your newly created domain.
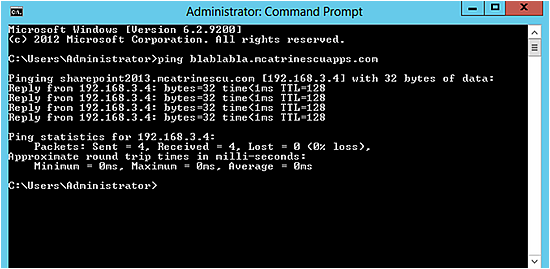
If the ping command returns the correct IP address, then your wildcard for the domain name was configured successfully.
3. Starting the required services
Apps rely on the App Management and Microsoft SharePoint Foundation Subscription Settings service applications. These service applications use the multi-tenancy features to provide app permissions and create the subdomains for apps. Therefore, even if you are not hosting multiple tenants, you must still establish a name for the default tenant for your environment (any SharePoint site that is not associated with a tenant will be in the default tenant). In this step we will start the two required services!
- Verify that you are a member of the farm administrators group in Central Administration.
- In SharePoint 2013 Central Administration, click System Settings.
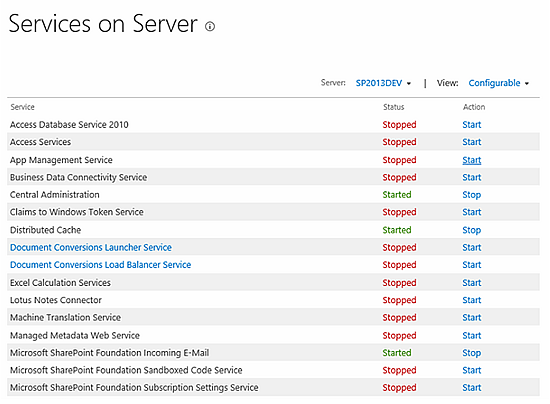
- On the System Settings page, under Servers, click Manage services on server.
- On the Services on Server page, next to App Management Service, click Start.
- On the Services on Server page, next to Microsoft SharePoint Foundation Subscription Settings Service, click Start.
- Verify that the App Management and Microsoft SharePoint Foundation Subscription Settings services are running.
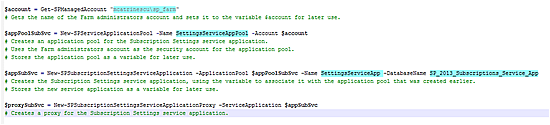
4. Creating the Subscription Settings and App Management Service Applications
In this step we will create the two Service Applications we talked about in the previous step. As you know, Microsoft is strongly promoting PowerShell to the SharePoint Administrators, and to make sure you start using it, they made it the only way to configure the Subscription Settings Service Application. Since we will be doing PowerShell for the first one, we will both in PowerShell.
Verify that you have the following memberships:
- securityadmin fixed server role on the SQL Server instance.
- db_owner fixed database role on all databases that are to be updated.
- Administrators group on the server on which you are running the Windows PowerShell cmdlets.
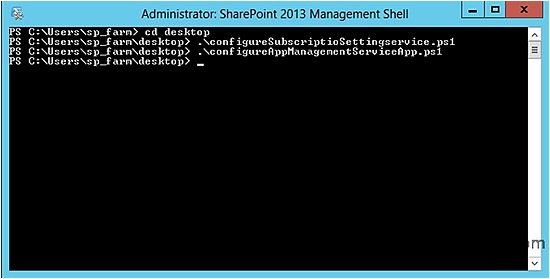
- In the configureSubscriptioSettingservice.ps1 script, change the values that are in blue in the following script. You download the script from http://sdrv.ms/TvjLOS
- In the configureAppManagementServiceApp.ps1 script, change the values that are in blue in the following script. You download the script from http://sdrv.ms/TvjLOS
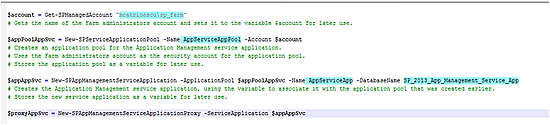
- Open SharePoint 2013 Management Shell as an Administrator and run the scripts.
5. To configure app URLs
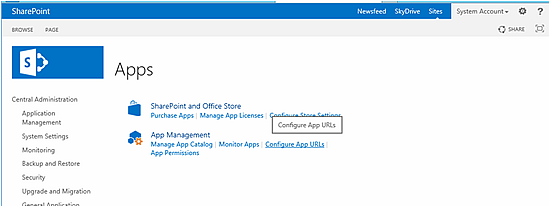
- In Central Administration, click Apps.

- On the Apps page, click Configure App URLs.
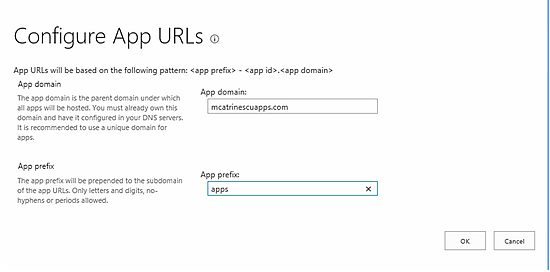
- In the App domain box, type the isolated domain that you created for hosting apps.
- In the App prefix box, type a name to use for the URL prefix for apps.
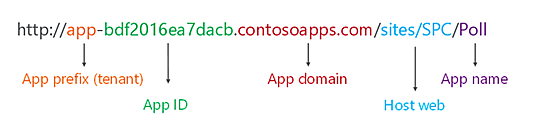
Original picture by Chris Whitehead and Sam Hassani
Here is how your URL will look like depending on the settings!
- Click OK.
5.5 To configure Internet-facing endpoints for apps (Optional)
The SharePoint Store contains apps for SharePoint intended for use with sites that require Internet-facing endpoints. By default, these apps are not available (greyed out and cannot be purchased) because they are incompatible with most sites. However, if your farm is configured to allow internet-facing end points, you can turn on the Internet-facing endpoints feature to show these apps in the SharePoint Store. You turn this feature on in Central Administration.
- In Central Administration, click Application Management.
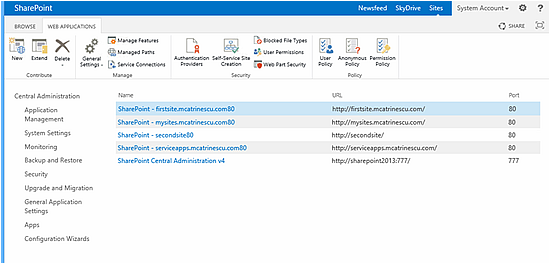
- On the Application Management page, click Manage Web applications.
- On the Manage Web Applications page, select the web application that you want to change.
- On the ribbon, click Manage Features.
- In the feature list, next to Apps that require accessible internet facing endpoints, click Activate.
- Click OK.

6. Fix the “Out of the Box” errors.
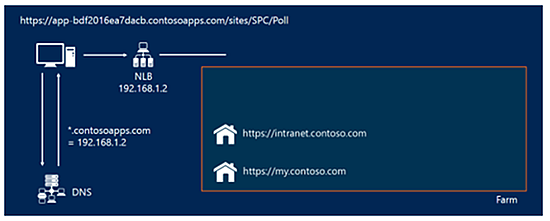
Our environment is now fully setup, however there is a little problem. Back in step 1, we created a new domain that will host our apps. When a user is browsing the site www.mcatrinescu.com and clicks an app, he will be forwarded to www.apps-00000(ID).mcatcatrinescuapps.com. We told our DC to forward those requests to our Front End, however SharePoint and IIS don’t understand it yet! How do we usually fix two URL’s going at the same site? AAM (Alternate access Mapping), but do you imagine doing this for every App? Luckily, there is a simpler way to fix this. We will create an empty-host header Web Application.
Since a picture is worth 1000 words, we are trying to get from here:
Original picture by Chris Whitehead and Sam Hassani
To here:
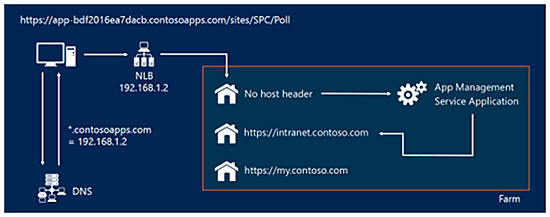
Original picture by Chris Whitehead and Sam Hassani
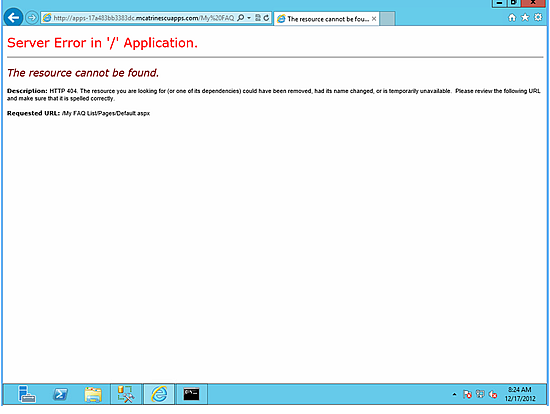
In case you are wondering, here is the 404 error you get if you try an app without applying the fix
Now, Let’s Fix it.
- Go into Central Administration and click Application Management
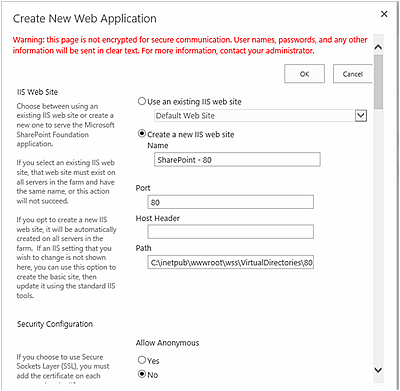
- Go into Manage Web Applications and create a new Web Application
- Click on New, set the Port to 80 and do not enter anything in the Host Header
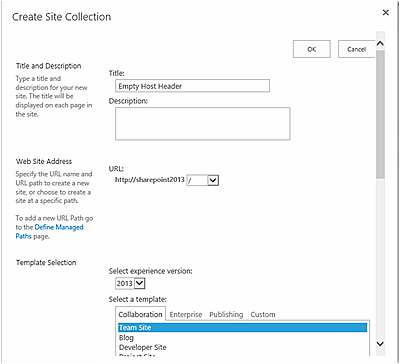
- After that, you create a Site Collection using the Team Site
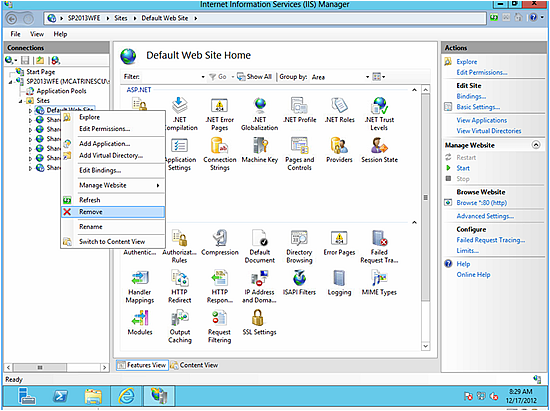
Now, we have to delete the Default Web Site from IIS!
- Go into IIS Manager as an administrator, and expand your Sites.
- Right click on the Default Website, and select Remove
7. Testing our Environment
Now that everything is set up we can finally test if we can run a simple application on our environment.
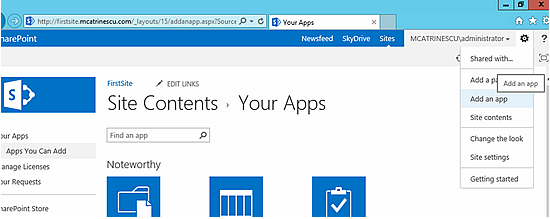
- Go on a Site Collection on which you are a Site Collection Administrator, click on the Settings “wheel” and “Add an app”
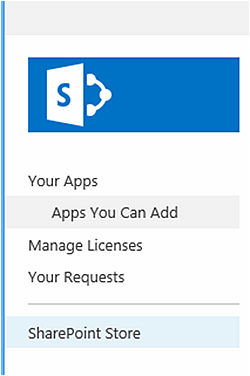
- In the Menu on the left side, choose “SharePoint Store”
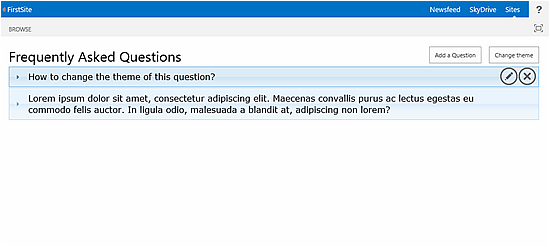
- Select the language at the top right, and choose an application! For my test I took the myFAQ application.
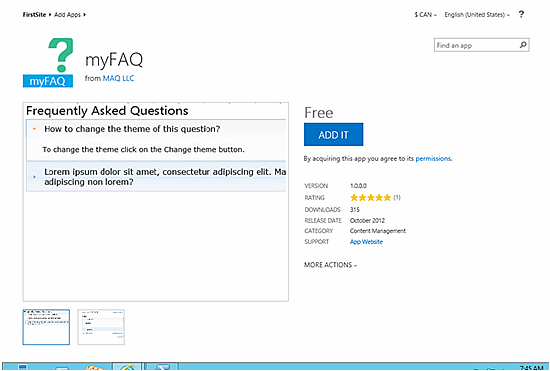
- Click the big “ADD IT” button, and then sign in with your LiveID and password.
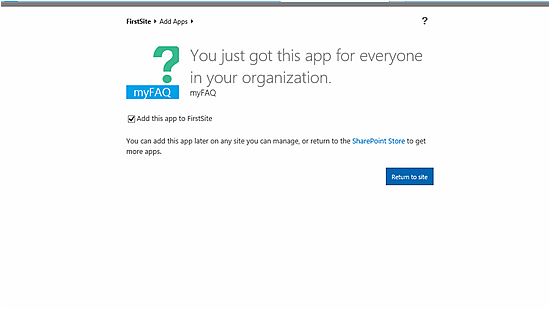
- After than, you will get the message “You Just got this app for everyone in your organization”. Now, leave the checbox “Add this app to [SiteName] Checked, and click the Return to Site button.
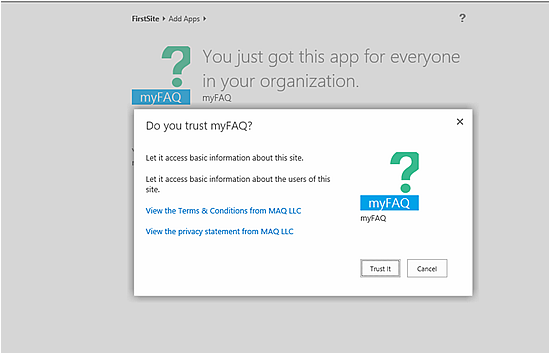
- In the next screen, click the “Trust It” button.
- Now, we give it a minute and we should be able to access your newly installed app. The MyFAQ looks like this
I hope this tutorial has been informative and clear enough to guide you through each step of the way. If you get any errors, or something is not clear, please leave a comment and I will answer as soon as possible!


