SharePoint 2019 supports content database migration from the SharePoint 2016 environment into the SharePoint 2019 environment.
Step 1. First, take a content database backup from SP 2016. Please follow the steps below.
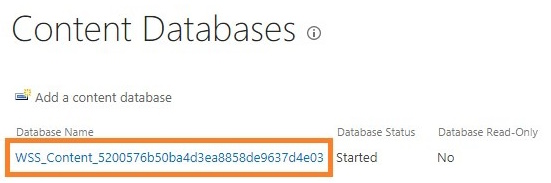
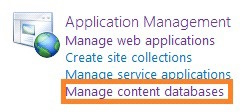
- Go to the central admin and click on “Manage Content Databases”.

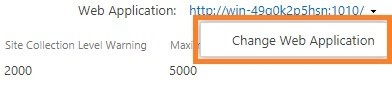
- Select the web application for which you need the content database backup.

- Copy the Content Database name. Then select the Content Database.
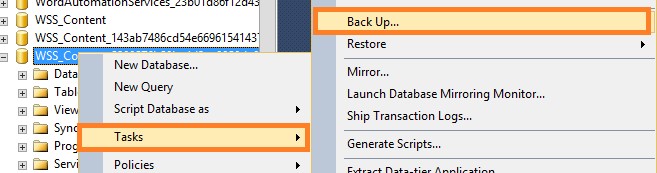
- Open the SQL server management studio. Expand the database. Select the database. Right-click on it. Select the Tasks > Back Up.
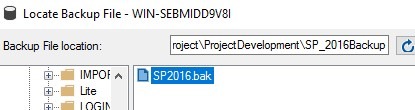
- It will navigate to the following window. Select the location below.
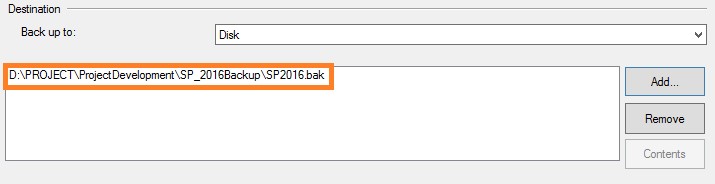
- Remove this path and add the path where you want to keep your backup (.bak) file.
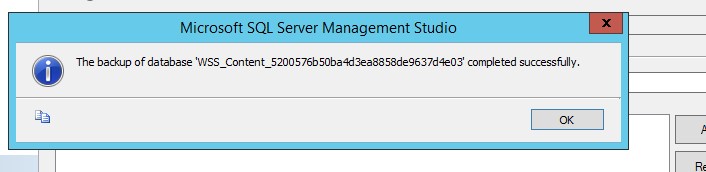
- Now, click on the OK button and wait till the backup completes successfully.
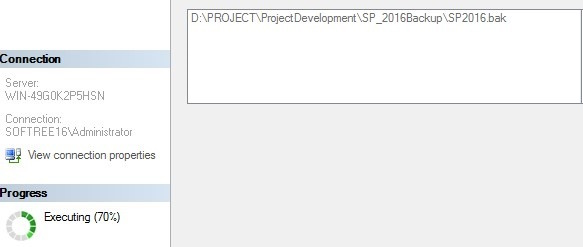
- Once complete you can see your .bak file in the location which you have set above.


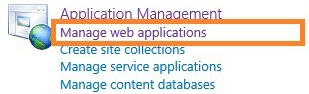
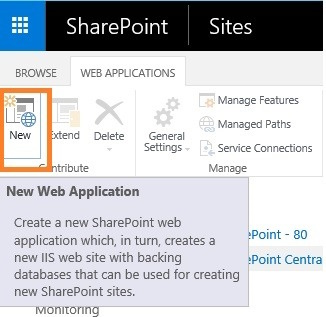
Step 2. Create a new web application on the SP 2019 environment. To create a new web application navigate to central admin and clicks on “Manage web application”.
And now, click the “New” ribbon button.
A modal dialog will appear. Please provide all the necessary information.

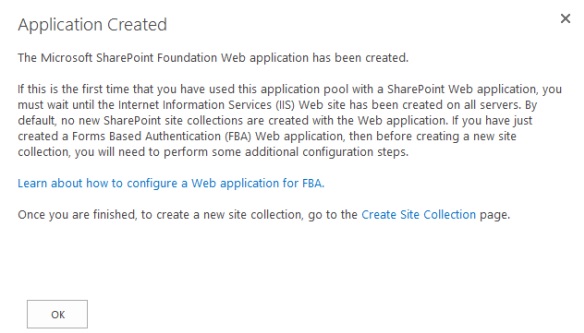
Now, please wait until the processing is finished.

Finally, you can see your new web application has been successfully created on your end.
After creating the web application follow these steps as mentioned below.
- Select Application Management then Select the Manage Content Database under the Databases.

- Select the web application you have created.
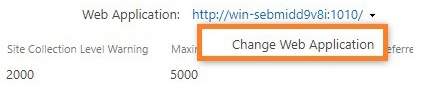
- Then click on the Content Database name (copy the name of the database to use it later on), it will take you to the Manage Content Database Settings page.

Under the Database Status, select the “Offline” option from the dropdown list.
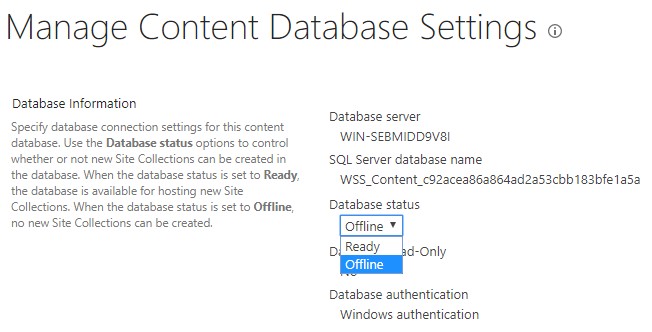
Check the Check Mark in the "Remove content database" checkbox.
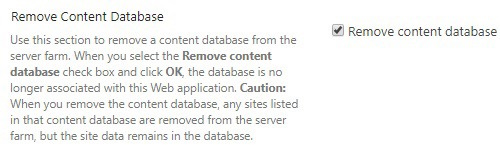
A prompt will come, select OK on that. Now the content database is removed from the web application.
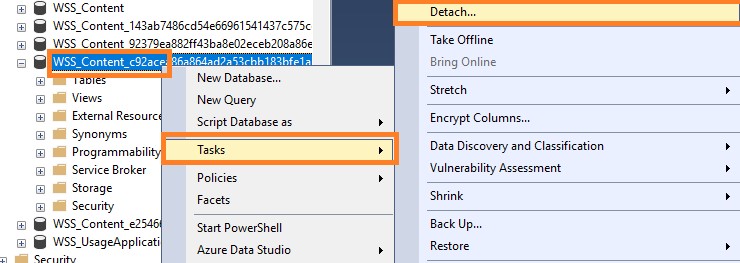
- To detach the Content Database from SQL Server Management Studio please follow the steps: Connect the SQL Server Management Studio => Expand the Database. => Select the content database name that you have copied previously=> Right-click on SQL => Tasks= > Detach.
- Check the checkbox in the Drop and click OK.

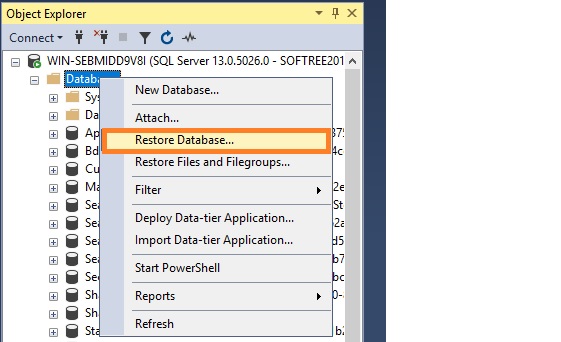
Step 3. Restore the 2016 database.
- Right Click on Database and select Restore.
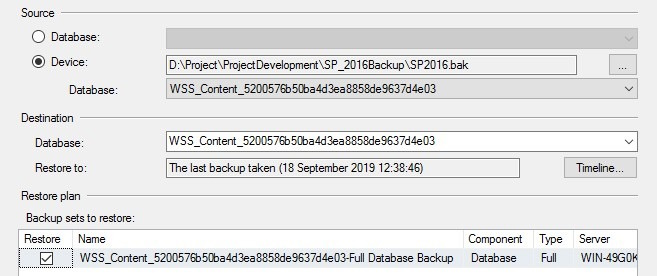
- Now select the “Device” radio button and browse the path where you have kept the SP2016 backup file.
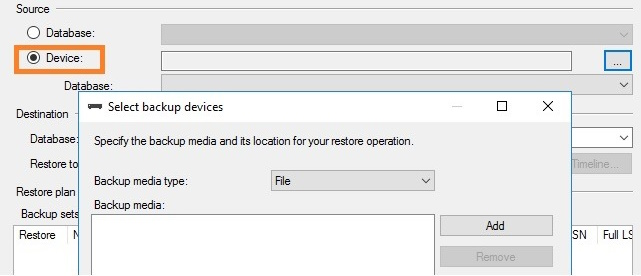
- Select the file from the folder.
- Now, you can see a similar window as shown below. Please verify the things and then click on the “OK” button.

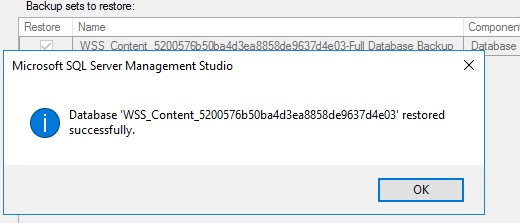
- Please wait for it to successfully restore the database on your SP2019 SQL Server environment.
Step 4. Now, the time has come to associate and upgrade this content database to SP2019's newly created web application. Please use the below command to mount the database to a new web application.
- Open the SharePoint 2019 Management Shell as “Run as Administrator”.

- Once the command executes successfully, then you will get a message, as shown below.
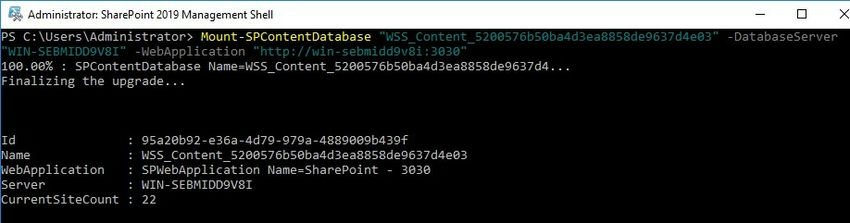
- This command will upgrade the database and attach this content database to the web application.
- If required, upgrade the service applications.
- If you get any errors while executing the above command then please refer to the log file to get more details. Please click on « Upgrade and Migration » and then click on « Check Upgrade Status » from Central Administration.


