SharePoint Framework is the new development model in which lots of work has been going on in the past year. It went to General Availability on Feb 23, 2017. It is a page and Web Part model that provides full support for client-side SharePoint development, easy integration with SharePoint data and support for open source tooling. With SharePoint Framework, you can use modern Web technologies and tools in your preferred development environment to build productive experiences and apps in SharePoint.
In this article, we will see how to create a client Web Part, using SharePoint Framework and React JS that displays SharePoint List data , which is retrieved, using REST API. The major project files used in this solution have been zipped and uploaded at Microsoft TechNet Gallery. Feel free to download it.
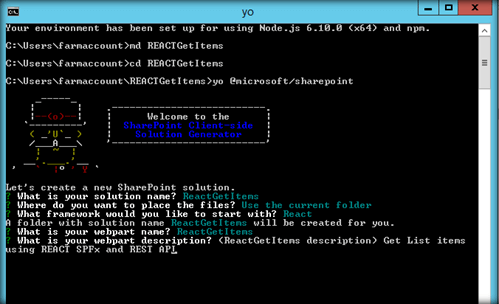
Let’s get started with the creation of the project by creating a directory.
md REACTGetItems
cd REACTGetItems
Run yeoman generator, using the command ‘yo @microsoft/sharepoint’.
Edit the Web Part
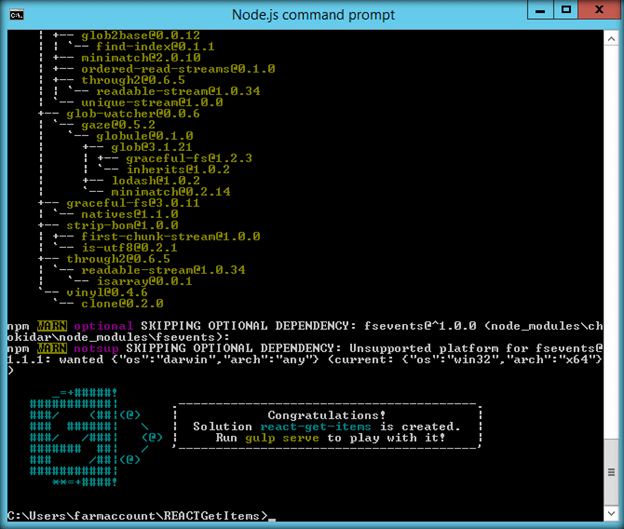
Run the code to create the scaffolding and open the project in Visual Studio Code. We will be requiring jQuery to make AJAX REST API calls. Thus, let’s install jQuery, using NPM, as shown below.
npm install --save jquery
npm install --save @types/jquery
Later, we will import them to the solution in the ReactGetItems.tsx file, using
import * as jquery from 'jquery';

Exploring the file structure
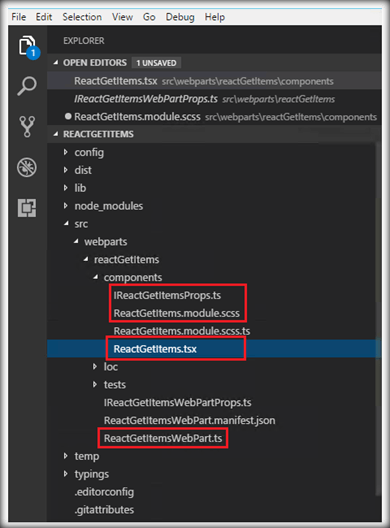
We will be making use of the above marked files to implement the solution, using React.
- TS- This will hold the properties, which will be accessed by other files in the solution. By default, there is a defined description property, which we will add to another property ‘siteURL’ as well using the interface.
- ReactGetItems/modue.scss- This will contain the CSS styles, which are used within the TSX file.
- tsx- This file serves as the major location, where the UI and Logics are defined.
- ts- This acts as the starting point of the control flow and data rendering phase is initiated from this file, using the ReactDom.render method.
ReactGetItemsWebPart.tsThe rendering of the Web Part is initiated from the ReactGetItemsWebPart TS file . Here, ReactDom.render method takes the first parameter as the element, which should be rendered (after processing some logic) at the second parameter. The element is defined by the class ‘ReactGetItems’. ReactGetItems extends React.Component in the ReactGetItems.tsx file contains the major logic processing and UI.
- export default class ReactGetItemsWebPart extends BaseClientSideWebPart<IReactGetItemsWebPartProps> {
-
- public render(): void {
- const element: React.ReactElement<IReactGetItemsProps > = React.createElement(
- ReactGetItems,
- {
- description: this.properties.description,
- siteurl: this.context.pageContext.web.absoluteUrl
- }
- );
-
- ReactDom.render(element, this.domElement);
- }
This file contains the properties, which will be accessed across the files and are declared, using an Interface, as shown below.
- export interface IReactGetItemsProps {
- description: string;
- siteurl: string;
- }
The CSS style used by the Web Part is defined within this file The CSS used for our Web Part is given below.
- .tableStyle{
- display: table ;
- margin-left : 100px ;
- }
- .panelStyle{
- background: lightblue ;
- }
-
- .divStyle{
- background: #eee ;
- padding: 20px ;
- margin: 20px ;
- }
-
- .headerCaptionStyle{
- background: #4B6978 ;
- display: table-row ;
- border: solid ;
- text-align : center ;
- width : 420px ;
- height : 30px ;
- padding-top : 3px ;
- color : white ;
- margin-left : 100px ;
- display : block ;
- }
-
- .headerStyle{
- background: #4B6978 ;
- display: table-row ;
- border: solid ;
- text-align : center ;
- width : 100px ;
- height : 30px ;
- padding-top : 10px ;
- color : white ;
- }
-
- .tableCaptionStyle{
- background:#4B6978 ;
- display: block ;
- font-size : 20px ;
- font-weight: bold ;
- border: solid ;
- text-align : center ;
- width : 650px ;
- height : 30px ;
- padding-top : 3px ;
- border-radius: 25px ;
- margin-left : 30px ;
- margin-top : 20px ;
- color:white;
- }
-
-
- .rowCaptionStyle{
- width : 600px ;
- display : table-caption ;
- background: #4B6978 ;
- text-align : center ;
- padding: 20px ;
- font-size : 20px ;
- font-weight : bold ;
- color : white ;
- }
-
- .rowStyle{
- display : table-row ;
- background: #eee ;
- padding: 20px ;
- margin: 20px ;
- font-weight : bold ;
- }
-
- .CellStyle{
- display: table-cell ;
- border: solid ;
- border-color : white ;
- text-align : center ;
- width : 100px ;
- height : 30px ;
- padding-top : 10px ;
- }
This is the primary file, where the logic and UI are written. ReactDOM.render method in the ReactGetItemsWebPart file passes the control over to this file. Class ReactGetItems extends React.Component and implements a constructor, where the state objects are initialized. The state object contains the list columns, which will be populated, using REST API calls.
- public constructor(props: IReactGetItemsProps, state: IReactGetItemsState){
- super(props);
- this.state = {
- items: [
- {
- "EmployeeName": "",
- "EmployeeId": "",
- "Experience":"",
- "Location":""
- }
- ]
- };
- }
The class also contains componentDidMount method implementation, which will be called after mounting of the component. We can also make use of componentWillMount, which is synchronous in nature. We will make REST API call within this method to retrieve the list items and add it to the state object.
- public componentDidMount(){
- var reactHandler = this;
- jquery.ajax({
- url: `${this.props.siteurl}/_api/web/lists/getbytitle('EmployeeList')/items`,
- type: "GET",
- headers:{'Accept': 'application/json; odata=verbose;'},
- success: function(resultData) {
- reactHandler.setState({
- items: resultData.d.results
- });
- },
- error : function(jqXHR, textStatus, errorThrown) {
- }
- });
- }
Finally, Render method will read the state object and build the UI.
- public render(): React.ReactElement<IReactGetItemsProps> {
- return (
-
- <div className={styles.panelStyle} >
- <br></br>
-
- <br></br>
- <div className={styles.tableCaptionStyle} > Demo : Retrieve SharePoint List Items using SPFx , REST API & React JS </div>
- <br></br>
- <div className={styles.headerCaptionStyle} > Employee Details</div>
- <div className={styles.tableStyle} >
-
- <div className={styles.headerStyle} >
- <div className={styles.CellStyle}>Employee Name</div>
- <div className={styles.CellStyle}>Employee Id </div>
- <div className={styles.CellStyle}>Experience</div>
- <div className={styles.CellStyle}>Location</div>
- </div>
-
- {this.state.items.map(function(item,key){
-
- return (<div className={styles.rowStyle} key={key}>
- <div className={styles.CellStyle}>{item.EmployeeName}</div>
- <div className={styles.CellStyle}>{item.EmployeeId}</div>
- <div className={styles.CellStyle}>{item.Experience}</div>
- <div className={styles.CellStyle}>{item.Location}</div>
-
- </div>);
- })}
- </div>
- </div>
- );
- }
Now, let’s test the solution in SharePoint Online Workbench. Run Gulp Serve in the node command and head over to SharePoint Online Workbench URL by appending ‘_layouts/15/workbench.aspx’ to the URL.
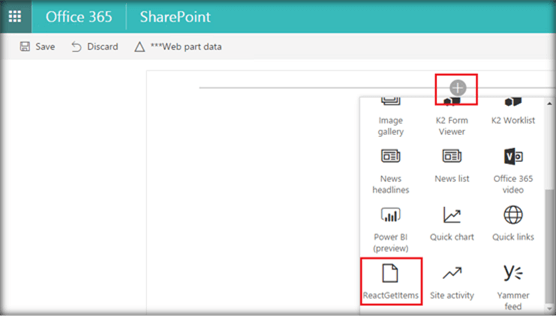
The retrieved data has been displayed as a Grid, as shown below.

TSX file contents for retrieving list items using REST API and REACTTSX file contents are used to retrieve the list items via REST API are given below.
- import * as React from 'react';
- import styles from './ReactGetItems.module.scss';
- import { IReactGetItemsProps } from './IReactGetItemsProps';
- import { escape } from '@microsoft/sp-lodash-subset';
- import * as jquery from 'jquery';
-
- export interface IReactGetItemsState{
- items:[
- {
- "EmployeeName": "",
- "EmployeeId": "",
- "Experience":"",
- "Location":""
- }]
- }
-
- export default class ReactGetItems extends React.Component<IReactGetItemsProps, IReactGetItemsState> {
-
- public constructor(props: IReactGetItemsProps, state: IReactGetItemsState){
- super(props);
- this.state = {
- items: [
- {
- "EmployeeName": "",
- "EmployeeId": "",
- "Experience":"",
- "Location":""
- }
- ]
- };
- }
-
- public componentDidMount(){
- var reactHandler = this;
- jquery.ajax({
- url: `${this.props.siteurl}/_api/web/lists/getbytitle('EmployeeList')/items`,
- type: "GET",
- headers:{'Accept': 'application/json; odata=verbose;'},
- success: function(resultData) {
- reactHandler.setState({
- items: resultData.d.results
- });
- },
- error : function(jqXHR, textStatus, errorThrown) {
- }
- });
- }
-
-
- public render(): React.ReactElement<IReactGetItemsProps> {
- return (
-
- <div className={styles.panelStyle} >
- <br></br>
-
- <br></br>
- <div className={styles.tableCaptionStyle} > Demo : Retrieve SharePoint List Items using SPFx , REST API & React JS </div>
- <br></br>
- <div className={styles.headerCaptionStyle} > Employee Details</div>
- <div className={styles.tableStyle} >
-
- <div className={styles.headerStyle} >
- <div className={styles.CellStyle}>Employee Name</div>
- <div className={styles.CellStyle}>Employee Id </div>
- <div className={styles.CellStyle}>Experience</div>
- <div className={styles.CellStyle}>Location</div>
-
- </div>
-
- {this.state.items.map(function(item,key){
-
- return (<div className={styles.rowStyle} key={key}>
- <div className={styles.CellStyle}>{item.EmployeeName}</div>
- <div className={styles.CellStyle}>{item.EmployeeId}</div>
- <div className={styles.CellStyle}>{item.Experience}</div>
- <div className={styles.CellStyle}>{item.Location}</div>
-
- </div>);
- })}
-
- </div>
- </div>
- );
- }
- }
Summary
Thus, we saw how to create a SharePoint Framework Client Web Part that retrieves and displays List Items, using REST API and React JS.